JRBentley.com
The Engineman's
A few words about this Asian Minilathe:
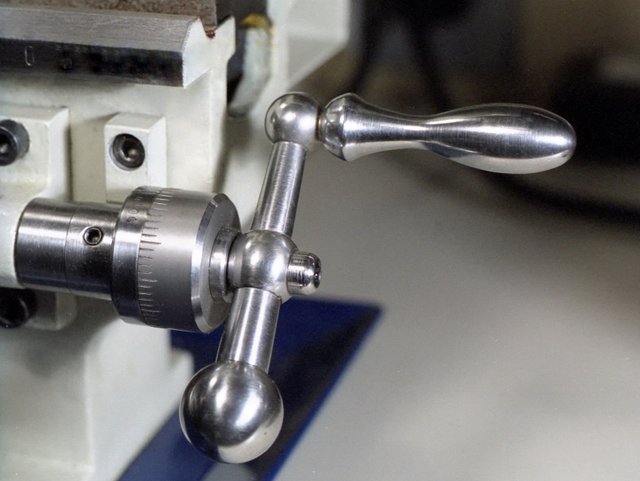
Here is a ball handle crank that I made along with a graduated collar for the end of the leadscrew. It is a welcome addition when precise longitudinal movements of the carriage are required.
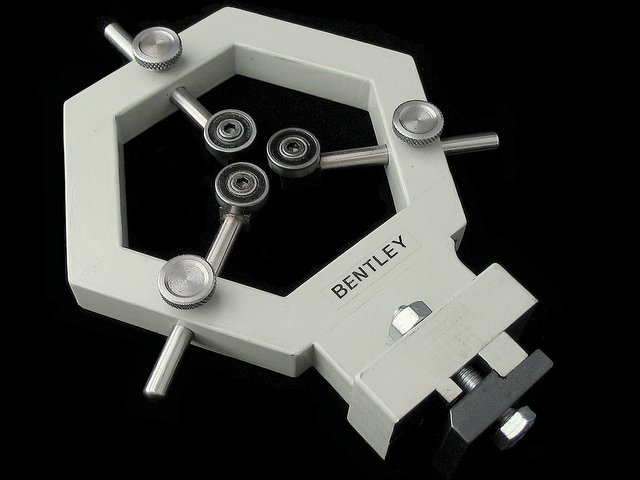
A ball-bearing steady rest made from pieces of square bar and silver-soldered together.
By the way, that's the old Taig chuck that I modified... I ordered a brand new one for my Taig out of respect for its faithful service.
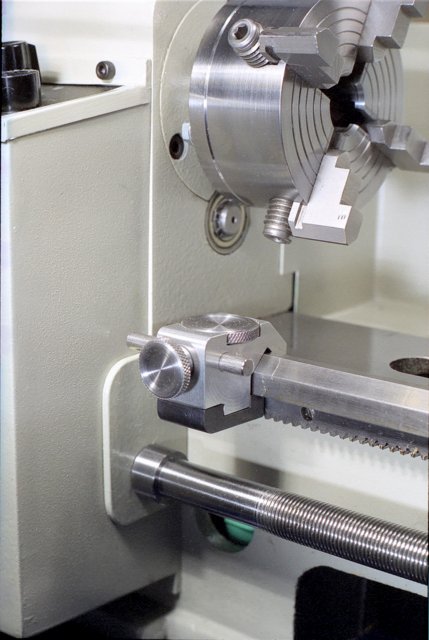
An adjustable carriage stop was made from stainless steel and aluminum.
To stay on this old Engineman site use these links:

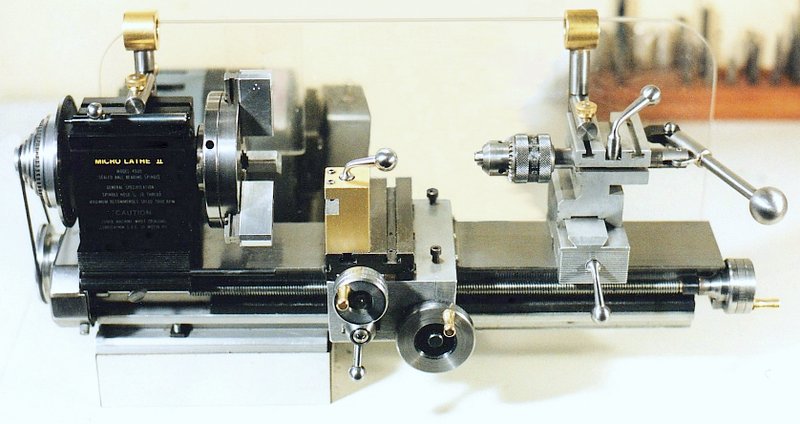
This was the heart of my workshop for the better part of twenty years. It's a mid-1980's Taig Model 4500 Micro Lathe II made when the company was still in California. I purchased it from a dealer in 1986 with most of the available accessories. It was a used unit, six months old and was turned in by a model builder who needed a considerably larger lathe.
I was impressed from the start by the sturdy headstock and chucks on the Taig. My purchase proved to be a most rewarding one indeed. As I gained experience using this diminutive machine, I found those so-called "impossible" tasks became easier each day.
All but two of the model engines pictured on these pages have been made on this lathe. I turned the two five-inch steel flywheels for my model sawmill engine, tiny needle valves and numerous fittings for 1/16 inch outside diameter pipe.
My tiny lathe is powered by a one-tenth horsepower Dayton motor and has had a rough life, always being pushed to the limit. I turn iron castings, stainless steel and naval brass (most cantankerous!) whenever the occasion demands and have not yet been left high and dry.
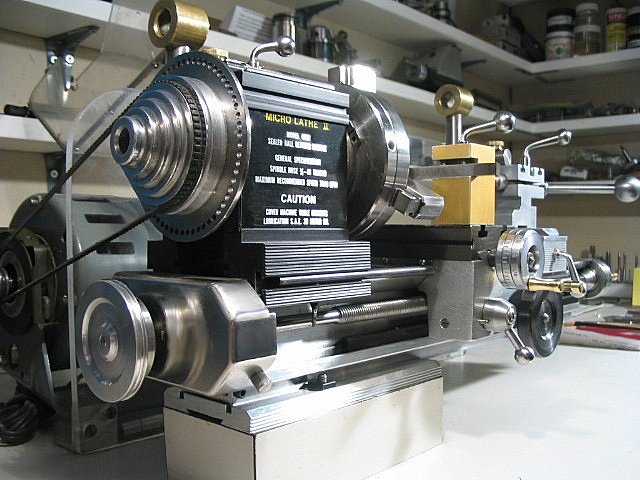
The machine is pictured above with some modifications evident. Years ago I added a 60-hole dividing plate with a locking plunger sliding in the top front T-Slot of the headstock. Leather wipers were installed on the carriage and my version of the Unimat type of threading attachment was devised to allow me to make threads of any form, pitch and diameter from a small sample held in a drill chuck mounted on the left side of the headstock pulley. Keith Brooke has taken the ball and developed this idea to perfection. He includes complete plans on Nick Carter's Taig Lathe site.
I have also added a leadscrew powered by a homemade gearbox. This is purely to get around feeding by rack and pinion and it's a dream to operate! I managed to get the leadscrew behind the apron without drilling or notching so it's out of the way and looks great. A graduated handwheel sits on the end of the leadscrew to perform precise transverse movements.
There is also a traveling steady and a tailstock die holder, but no modification to this machine has enhanced its capabilities as much as a full set of ball handles. They are easier on the hands, no more fishing for the hex wrench, and tool adjustment is so much faster. The new ball lever on the tailstock ram is so nice when pushing a 1/2 inch bit into mild or stainless steel.
After using this Taig Micro Lathe for more than 17 years, I felt that the renewal of at least some vital parts would eventually become necessary. This lathe is the center of my shop - it has been used to make every thing from tiny cocks, valves and fittings to model engine flywheels and I have even refinished a six - inch diameter brass school bell, using riser blocks. Over the years the little machine has produced at least a dozen miniature stationary and marine engines, literally hundreds of boiler fittings and a myriad of assorted tools and other contraptions.
Despite a punishing life, the condition of this tiny lathe still appears very little different from the brand new display model under glass at the dealer's showroom. No part of my machine is yet ready for replacement but some backup for the future would be comforting. Which part should I buy first? ....or all the parts? ...perhaps another lathe to ease the strain on the Taig? ...if so, an identical lathe or something different? This has been my dilemma for several years.
Well I love that little lathe like an old friend and I didn't think it should be replaced simply because it's a bit older. So I made the decision to buy replacement parts when needed and also to purchase a new Asian Minilathe to take the load of the "heavier" jobs and handle the majority of the screwcutting.
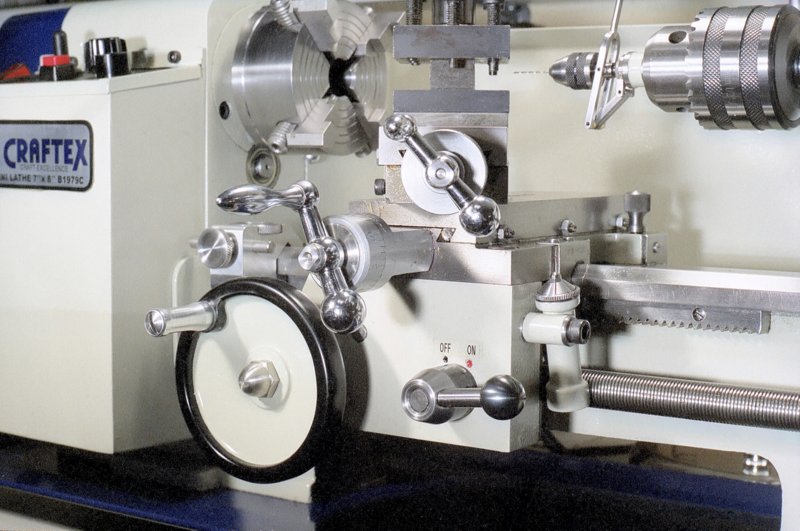
This is what the new minilathe looks like as it sits on my workbench.

( Note that the tiny Taig lathe actually handles longer work than the Minilathe. It is over 9 inches between centers. When using the accessory risers, it can swing a 6 1/2" wheel. However the Taig is a precision lathe and originally designed for lighter work.)
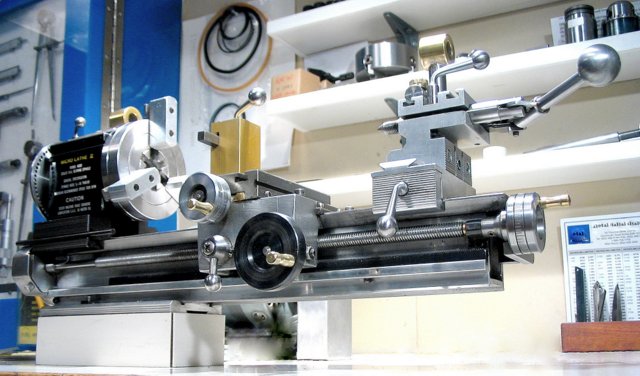
Since I purchased the lathe it has become a project in itself. I refinished and fitted it with a Taig 4-jaw chuck, replaced levers with ball handles, modified the handwheels, added a protractor scale to the compound, graduations to the tailstock ram, a graduated collar on the carriage handwheel, a protective cover to the apron gearbox, made a leadscrew handwheel with graduated collar, an adjustable carriage stop and a carriage lock, a headstock spindle crank, a sensitive drilling tailstock attachment, lathe bed wipers, a universal thread dial indicator, a ball-bearing steady rest, mixed up a proper touch-up enamel and as mentioned above, I refinished all the changewheels (including the large fine-feed gears).
My benchtop is oil resistant and non-porous so I dispensed with the bottom tray and mounted the lathe on bolts so the bed can be adjusted for zero warp.
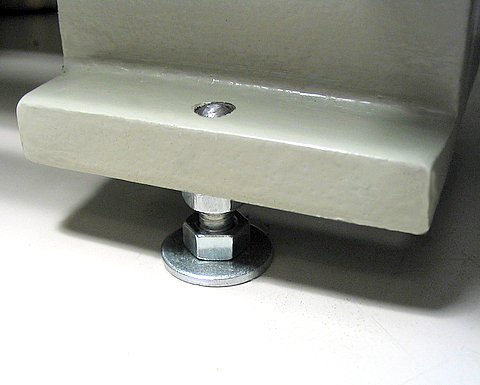
(the bed's lugs have tapped holes)
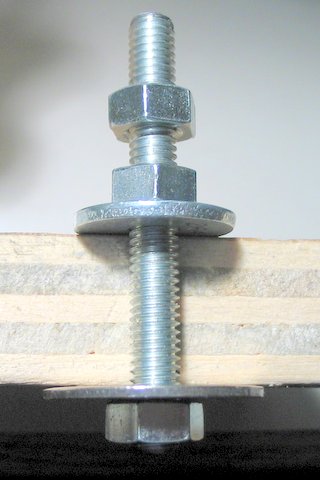
The bolt assembly with upper locking nut in relation to the plywood benchtop.
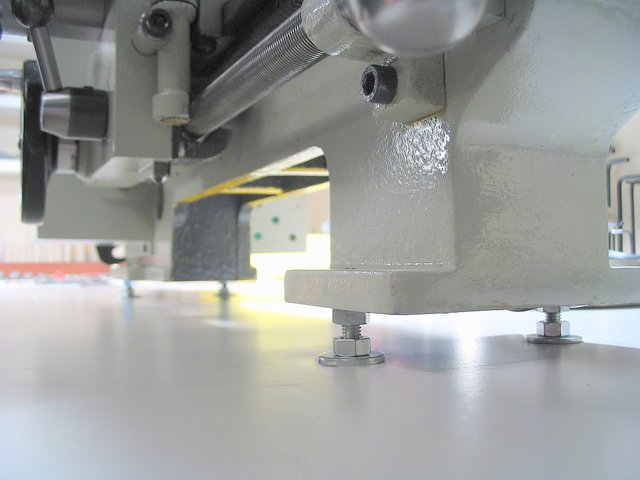
Here is a complete view under the lathe
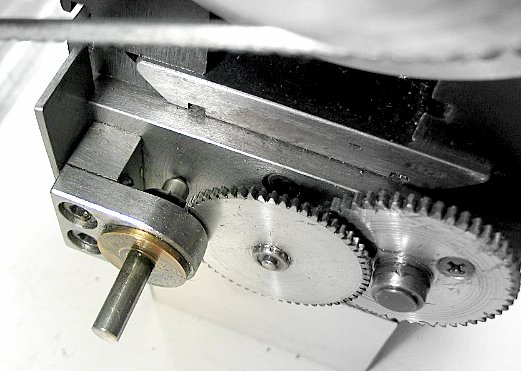
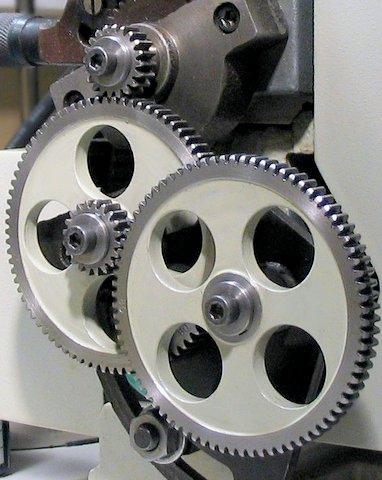
The steel gears were very roughly finished on the sides, but the shaft holes were accurately placed and the teeth were nicely machined. I decided to enhance their appearance by re-machining all the sides, adding depressions to the larger wheels. I painted the depressions with matching paint and on both sides of each wheel rim I stamped new legible numbers showing the how many teeth are on each changewheel.
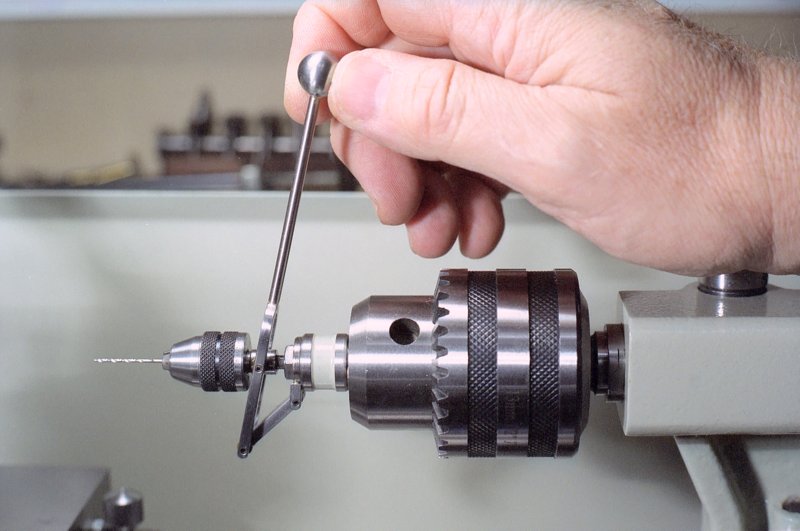
The photo below shows a sensitive drilling attachment. When needed it is simply placed in the large 1/2" drill chuck, which in turn is mounted with a No. 2 Morse Taper in the tailstock ram. The little chuck is a slightly-modified Dremel unit and holds bits up to 1/8" in diameter. Being a steam engine enthusiast, I made the sliding shaft enter through a graphite-yarn packed gland. It keeps it clean, smooth-operating and provides adjustable drag when required.
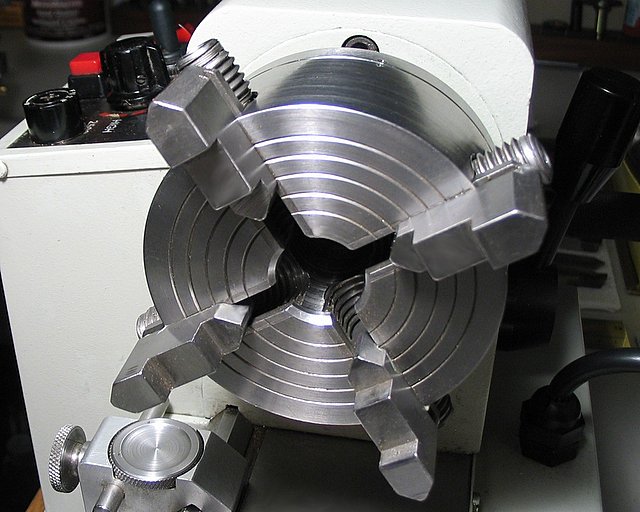
This next photo shows a Taig four-jaw chuck that has been modified and made to fit the headstock spindle in the same fashion as the stock three-jaw, self-centering chuck. The hole through the chuck was bored out to 3/4" diameter to match the spindle hole and extra centering grooves were cut in the face.
A cover plate and collar were added where the leadscrew enters the electronic control box to prevent metal swarf entering and causing artificial lightning!
Home
Models
or
Go to my newer site
